Background

Saturday, 15 March 2014

Bathroom Shelf Update

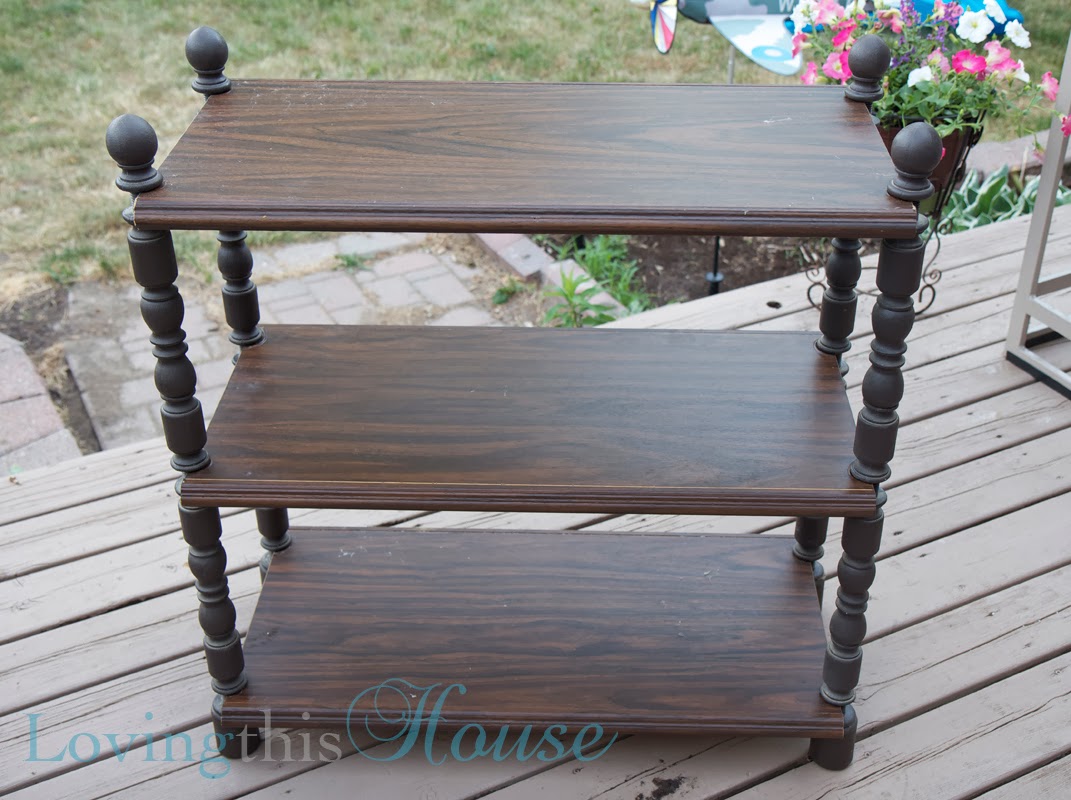
This old shelf was one of the only pieces of furniture I grabbed from my grandma's house after she passed away. For as long as I could remember, it stood beside her bed holding sewing supplies, photos, fake flowers, jars of buttons and who knows what else!


With a few coats of paint, we transformed the dated shelf into a nice addition to our main bathroom! (Sorry, grandma, I know it was 'perfect' just the way it was!)


I have no idea what the material of this is - some sort of plastic? It surely isn't wood, anyway! Regardless, it is a HEAVY sucker!


The legs just screwed into each other, so taking it apart was easy! Spray painting it took a few more coats than I thought. I believe this is two coats in the photo.


After running out of a few cans of spray paint, we decided that it would be best to just use a foam roller and some latex paint. We had some left over from a few projects in the past so we just used that.

We were being super lazy and didn't coat it. The fall was coming and it was getting too cold to paint outside, so we brought it in the bathroom as-is. It could actually use one more coat to touch up quite a few spots where the brown still shows.

After a couple of months, I have noticed some chipping in a few areas. Nothing drastic, but it could definitely use a final coat. It will have to wait for summer to be completely finished....which I hope is just around the corner!


But for now, it does its job in the bathroom just fine!


Tuesday, 25 February 2014

Faux Roman Blinds Tutorial

I finally made the roman blinds for our powder room (that I bought the fabric 2-1/2 years ago for!) 


I started by determining what size my finished curtain needed to be. The overall finished dimensions of my curtains were 28"W x 13"H.

We get a lot of directional light coming through the window, and even though these blinds are faux, I added a layer of black-out lining to them as I didn't want any streams of light coming through the fabric. You could probably get away with a dim-out lining but I had some black-out lining that I picked up from Fabricland for super cheap a while back, so I used that.

I figured I needed around 1m of material for the height and all the folds of the blinds, but I honestly didn't measure that part. 

I then put the fabric and lining together and left about 1" of fabric around the lining in order to make a 1/2" seam.


I folded the seam in once, once more over and pinned in place.


You could probably press your seams after pinning or, like me, just sew away!


After I sewed the first hem, I realized I should have pinned the lining to the fabric to avoid shifting. You may want to pin before you start sewing the hems. 


I continued to sew all the way around until all the seams were complete. Remove the pins and press with iron.


For the folds: I really just started folding it how I wanted it to look - not really measuring anything out. I knew that I needed all the folds where the dowels would sit at the back to gather at the same place, so I just started folding. 


After getting the folds to the look I wanted, I adjusted them slightly based on the overall height of the finished curtain. 


To keep the curtains straight, I used a 1/4" dowel. Since I wanted to make these dowels removable (for washing purposes), I used pieces of elastic to hold them in place.


I just used some hot glue and glued them along the folds that I noted above.


Once all the dowels were in place, it was ready to start folding together!


Since I didn't have any non-silk ribbon, I just cut some strips of cotton fabric (the cotton will allow the ties to hold and not slip away like silk ribbon would). I attached the fabric by using a dot of glue just above the top dowel.


I then fed the fabric strips through all the dowels, allowing them to gather at the same place.


Then I tied the cotton strips together, allowing the dowels to be held in place when the blind is hung.


To attach the the blinds to the wall, I used a scrap piece of wood laminate that measured the width of my curtains (28"). 

I wrapped it in the same fabric as my curtains so it will just hide once on the wall.


I then glued velcro to both the board and curtain. You could probably be fancier than me and sew the velcro on, but my trusty glue gun worked just fine for me. 


Thanks to my handy hubby, we installed it in no time!


I'm pretty pleased with the way it turned out! 


Stay tuned for the rest of the powder room makeover!

Monday, 17 February 2014

House Progress Update

Alright - it has been 6 months since I have posted on here, and it's time to start explaining myself!

In the past 6 months, A LOT has happened to us!

Back in September, Matt and I were hit in a car accident the day before our first wedding anniversary. Although we were fairly sore and had bad whiplash, we were both fine. Our car was totalled and we ended up having to find a new one. *Sigh*. We loved our car....


.....so much so, we bought the exact same one! (except 2 years newer - a 2012!)

Although the car was a write-off, we are thankful we were both fine and tried to poke fun of a bad situation.


Matt's car was broken into sometime in October after we got our new car. Shortly after, we had a water line to our fridge burst while out of town which caused a huge flood in our basement. And in December, we lost our big (and only) tree in our backyard due to a big ice storm that hit the city.

Did I mention that we had to replace our shingles in there somewhere?

Worst.Year.Ever.


In light of all these horrible string of back luck instances that keep happening to us, we continued to count our blessings.

The car accident was not our fault, so going through insurance and medical bills were easily dealt with.

The man who broke into Matt's car was caught and charged on a number of other theft related charges. Even though Matt had his car full of tools that night, the robber only stole a phone charger and a Mars bar (which Matt is still upset about!)

The water line breaking, although completely ruined the hardwood flooring we had JUST laid (that Matt worked so long on!) and damaged a lot of the basement ceiling and drywall (plus a few books), no sentimental or 'irreplaceable' memories were touched. My grandmother's 80(ish) year old trunk with all of her personal belongings, WWII love letters and photos had absolutely no water damage - even though the water got to the bottom of it. No electronics were ruined (including our computer filled with hundreds of photos). The photo albums, school notes, projects and diplomas had little or no water damage. We count ourselves very lucky and know there is an angel on our shoulder. 

We are pretty sure that we have had enough bad luck for the next 20 years, no? I hope so!

With all that said, our house is *almost* back together again! The new flooring has been put in, the basement has had a complete overhaul and we have been able to get back on our feet emotionally.

Rewind to August 2011:  When we initially moved in, we painted the house right away from the lovely green to a grey. 


Before the flood happened, we replaced the flooring on our main floor from carpet, laminate and tile to bamboo which Matt laid himself. It turned out gorgeous, he did an amazing job!


We found this cute message under the tile at the front entry when ripping the old stuff out. It seems they put the tile in only a year before we bought the house - sorry previous home owners but it just didn't work!

"Our baby was here,  June 26 2010"
Sadly, after the flood, it all had to be replaced. Below are a few photos of the renovations that have taken place since the flood! {Not posting photos of the flood because it was very depressing!}

The flooring in real life isn't as red as the photos make it seem to be.

Note:  We have only begun starting to put things back into place so it's a little unorganized. The contractors have a few more finishing touches to do before we can completely update the main floor! 


You can also check out the house tour here if you have forgotten what everything looked like before!

Updated basement photos to come soon!